
When I first got into brewing, I started small and simple. Very little process control was in place, the equipment was basic and easy to use, and the beer turned out… okay. As time went on, my brewery grew organically to include more and more pieces of specialized equipment whose purposes varied, but generally involved making brewdays easier or giving me a greater degree of control over the process. This is a pretty typical evolution that homebrewers go through, and something that offers the opportunity for your brewhouse to grow in sync with your brewing skills.
After relocating to Brooklyn, I took the opposite approach. Instead of organic growth, I preplanned my system on paper, acquired my parts, and then built-out the brewery over the course of several evenings. This was an exciting and daunting task; not something I’d recommend for someone just learning how to brew.
Acquisition of Parts and Build-Out
For what seemed like weeks, strange and wonderful pieces of stainless steel began arriving at my apartment. Thanks to the folks from places like Bargain Fittings, More Beer, and Williams Brewing, finding the parts I needed was fairly easy. The most difficult item to track down was a thick walled stainless steel kettle with a multi layered bottom in a 5-gallon format. Unfortunately, most 5-gallon kettles are designed for entry level or partial boil extract brewers. I wanted something sturdy that would provide better heat dispersion and retention. I ended up with a great little kettle from Midwest Brewing that fit the bill perfectly.
The actual build-out went simply enough. It was important to diagrammatically layout how all the components were fitted out in order to procure the right fittings, but also have a pseudo installation manual for building. From there, piecing together the components was rather easy and happened quickly. The most difficult task was using a step-bit to place holes into my thick walled kettle. My cordless drill was barely up to the task. It took multiple trials and battery charges, but in the end I successfully placed two holes into my kettle’s walls. Lubricant is your friend when drilling (yes, I said that) and keeps the bit cool while cutting through the kettle walls.
The Build-Out:
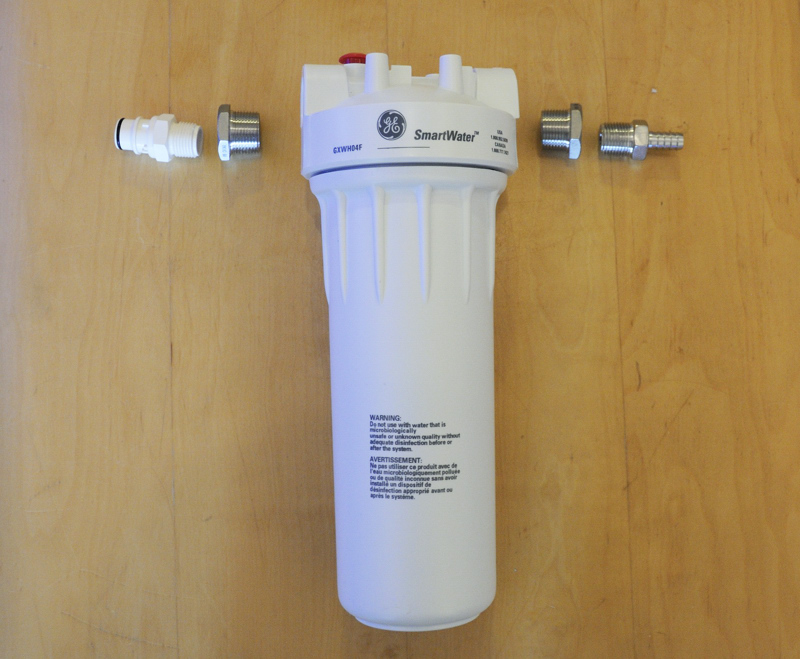
GE water filter ready to be assembled. There isn’t much chlorine in NYC water, but the filter is a relatively easy way to provide some piece of mind.
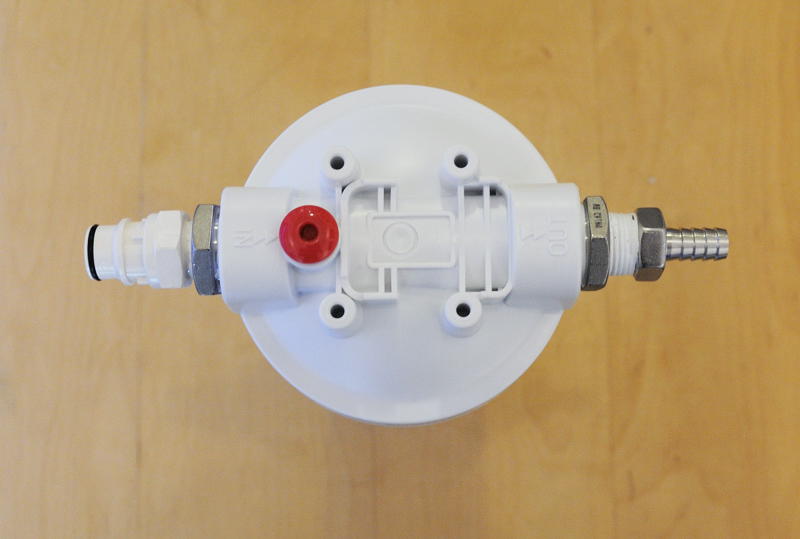
Quick disconnects allow me to quickly fill my kettle with filtered water. The plastic quick disconnect inlet snaps onto a hose with a threaded adapter for my kitchen faucet. The same hose is used later in the process to connect to the inlet on my my plate chiller. The barbed outlet connects to a hose used to fill my mashtun with strike water.
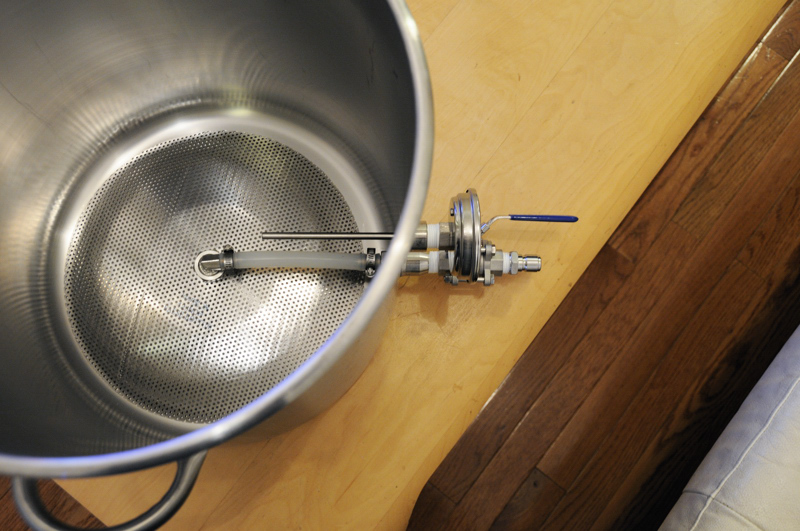
42 quart Polarware mashtun with stainless steel false bottom, 3-piece ball valve with quick disconnect, and thermometer. Strike water is directly fired in the mashtun.
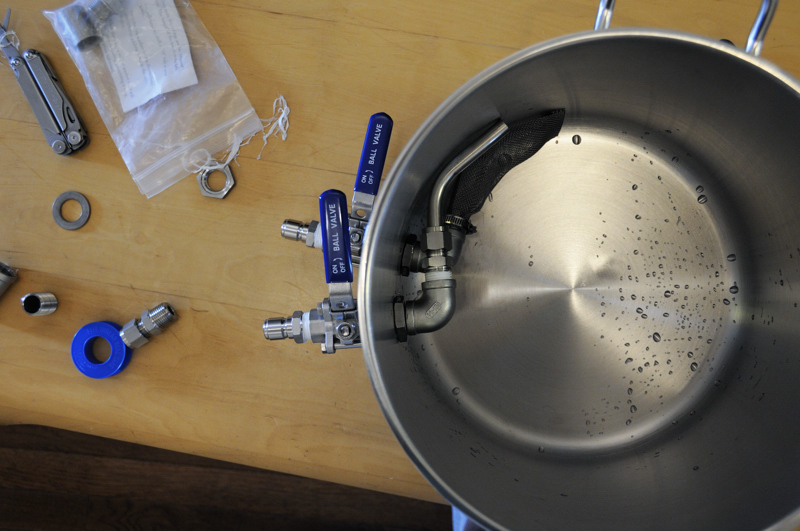
My 5-gallon kettle was installed with an outlet and tangential inlet for whirlpool purposes. Both bulkheads are fitted with 3-piece ball valves allowing for complete disassembly and cleaning. All equipment is fitted out with male stainless steel quick disconnects. All hoses are fitted with female stainless quick disconnects. This allows for maximum flexibility when chaining together equipment. The kettle screen on the outlet valve was a flawed design on my part and has since been removed due to excessive clogging. I know use a simple 90 degree elbow for the pickup and use hop bags to contain most hop material.
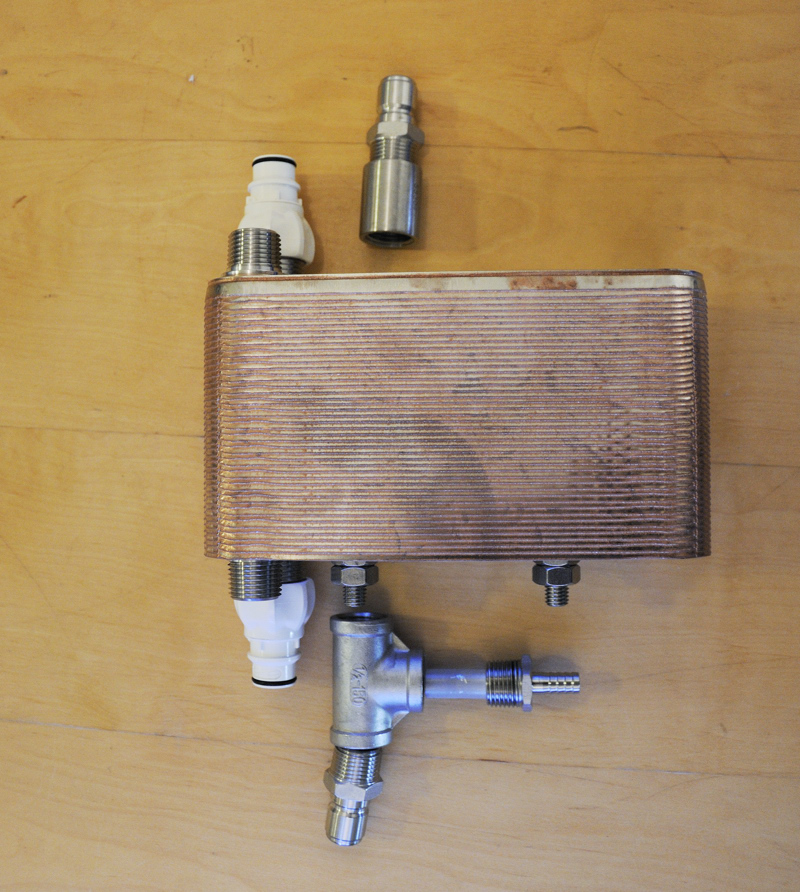
Blichmann Therminator with individual fittings laid out and ready to go together.
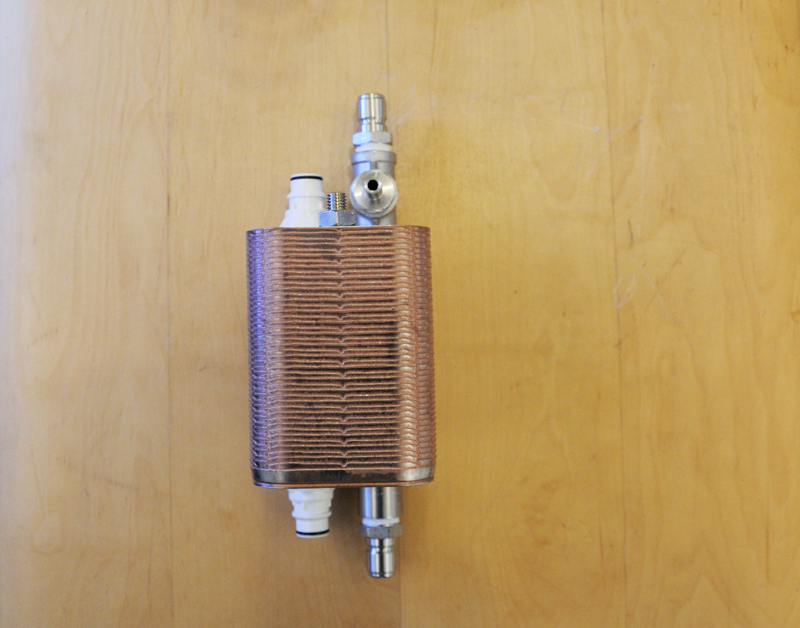
Fitted out with plastic quick disconnects on the water side and stainless quick disconnects on the wort side. I initially installed an inline O2 stone which has since been removed due to excessive foaming and concerns about sanitation.
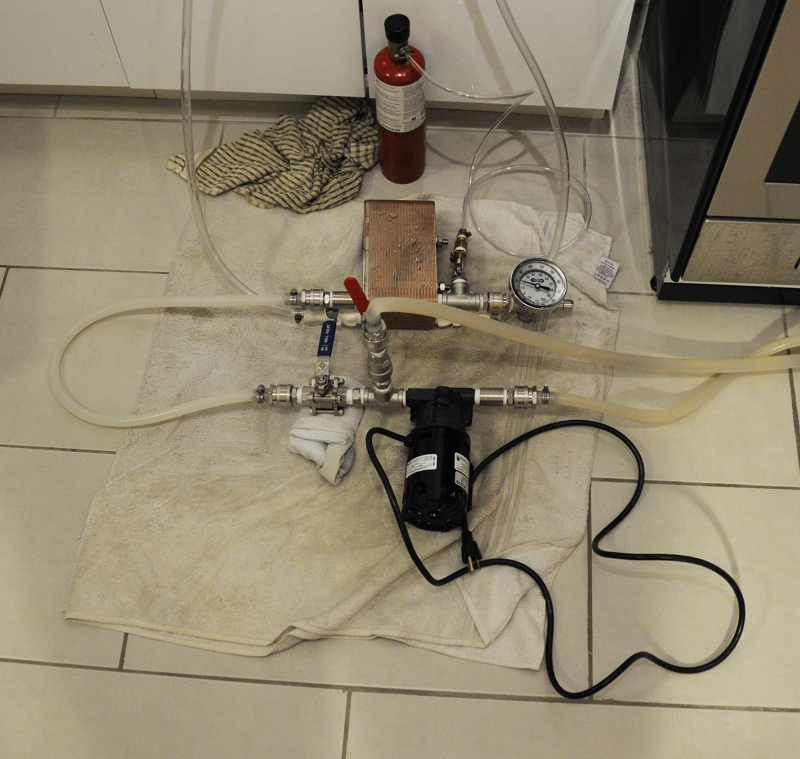
March Pump and fittings. I’ve installed the output side of the pump with two circuits for hot liquid. One can go straight back to the kettle for whirlpooling. The other circuit goes to the plate chiller and on to the fermenter. An inline thermometer on the plate chiller outlet tells me the temperature of wort heading to my fermenter.