
Making bread from spent grain sounds like a it should be a natural extension of our homebrewing activities. It feels like a waste every time I empty my mash tun into a garbage sack and put it out on the curb. The Internet is chalked full of frugal and innovative homebrewers transforming their grains into edible concoctions. Unfortunately, of all the recipes I’ve tried, and breads I’ve been fed by others, I’ve yet to have one that has truly impressed me.
The main complication with using spent grain (malted barley) for bread making is directly related to the grain’s inherent properties and acceptability for bread production. Bakers tend to use wheat because of its high gluten content and lack of husk. Barley doesn’t possess these same attributes, making it a poor grain for bread production. This is exasperated by the fact that once we’re done with the mash, we’re left with primarily fibrous husk matter, very low in protein and nearly devoid of any sort of carbohydrates. The only way to make truely artisinal quality spent grain bread is to realize this nature and take into account the ingredient’s limitations when formulating a recipe. Instead of seeing spent grain as a primary ingredient, I like to think of it as an adjunct, bringing a depth of flavor and interesting twist to my loaves of bread. The recipe described in this article will create a slightly sour, nutty, light and airy, spent grain loaf.
The Sourdough Stater – AKA My “Barm”
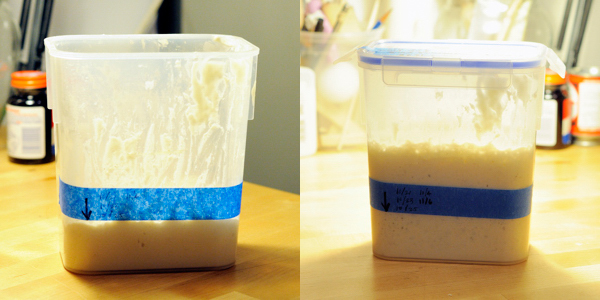
Once fed, your sourdough starter should double in size. The left photograph was taken right after the barm was fed, the right 24 hours later.
At the heart of any sourdough bread is a living starter. Sourdough starters contain a community of yeast and bacteria which are used to leven and acidify the bread. While you can buy a commercial sourdough starter from places like King Arthur Flour, I started mine from scratch using techniques found in Peter Reinhart’s – The Bread Baker’s Apprentice. Beginning with Reinhart’s methodology, I then supplemented the naturally occurring microbes found on flour with the dregs from a number of sour beers. I’m not sure the magnitude of this addition in the grand scheme of things, but I’m pretty happy with how my starter acidifies and levens bread. This is aided by the fact that I like to keep my starter at a relatively low-level of hydration (62% flour, 38% water) to encourage extra acidification. Two days before I’m ready to start building my dough, I make sure to feed my starter and ensure that it healthy and able to double itself in size without too much effort. With each feeding, I double the size of my starter. Starter health is very important; if I’ve allowed the starter to go dormant in the fridge for an extended period, I will typically feed it at least a couple of times over a week or two before using it to produce bread.
Preparing the Spent Grain
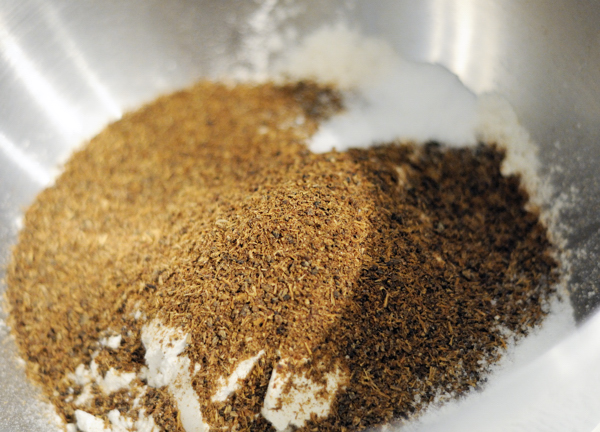
I grind my spent grain in a food processor to avoid any large chunks of husk in the final bread.
I like to store my spent grain dry so that it is shelf-stable and I can have it on-hand for whenever I want to bake a loaf of bread. To do this, I spread my wet, spent grain out on a baking sheet and dry it in the oven at the lowest temperature my oven can keep — around 200° F. I frequently turn the grain so that it dries evenly. The grain will take on a bit of color during the drying process, which helps add another level of flavor to the bread. Be careful not to burn the grain as it will lend an unpleasant flavor to your bread.
Building the Dough
When making my spent grain sourdough bread, I utilize a 3-day build and bake regiment. The recipe below will produce a 3lb. 9oz boule-type loaf that comfortably cooks inside my 6-quart cast iron Dutch oven. This amount of dough can be split up into smaller loaves, if desired. Cast iron baking was popularized by the New York Times’ article on ‘No-Knead’ baking and works well in my undersized, weak oven. Ratios of ingredients and the breakdown of loaves can be modified by maintaining the ratios while scaling down the amounts of ingredients.
Day 1: Build a Firm Starter
The first step is to create a firm starter. I like to make this very dry in order to encourage as much acid production as possible. The dough produced will be very firm and almost Playdough-like. The dough will get loosened up in the next step of the build.
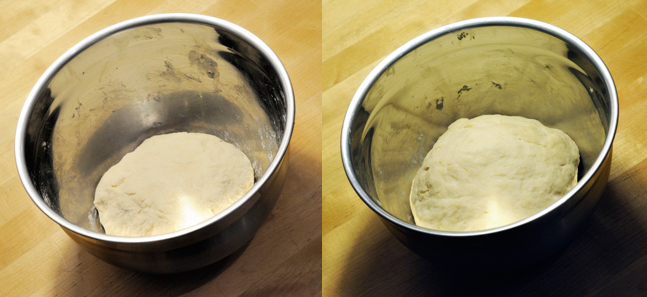
The firm starter before (left) and after (right) fermentation.
8 oz. – Sourdough Starter (Barm)
8 oz. – Bread Flour
1.5 oz. – Cold Water
Mix ingredients in a bowl until well combined. Cover and ferment at room temperature for 24 hours. Dough will grow, but may not double in size during this period.
Day 2: Produce Final Dough and Retard Overnight
On Day 2, I build the final dough. The ingredients are mixed, the loaf shaped into a boule and placed into a 6-quart cast iron Dutch oven and then everything is placed in the fridge for a cold, extended fermentation. The dough produced should be slightly tacky and barely pull away from the sides of the mixing bowl. The amount of flour and water may need to be adjusted depending on your kitchen’s humidity in order to achieve this consistency.
17.5 oz. – Firm Starter Produced on Day 1
22 oz. – Bread Flour
18 oz. – Cold Water
1 oz. – Dry Spent Grain – pulverized in a food processor.
5 tsp. – Kosher Salt
1. Incorporate ingredients in a mixing bowl.
2. Knead in a mixer with a bread hook for 5 minutes.
3. Let the dough rest for 5 minutes.
4. Knead in a mixer with a bread hook for another 5 minutes.
5. Shape bread into a boule and then place in a oiled cast iron Dutch oven.
6. Place covered Dutch oven into fridge for approximately 24 hours.
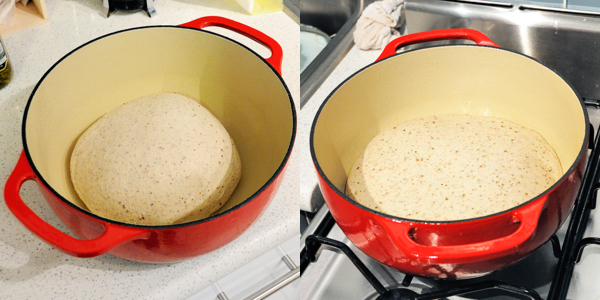
The dough is shaped into a boule (left image) and then placed into the fridge for a long slow fermentation. After 24 hours, it has grown in size (right image).
Day 3: Proof and Bake
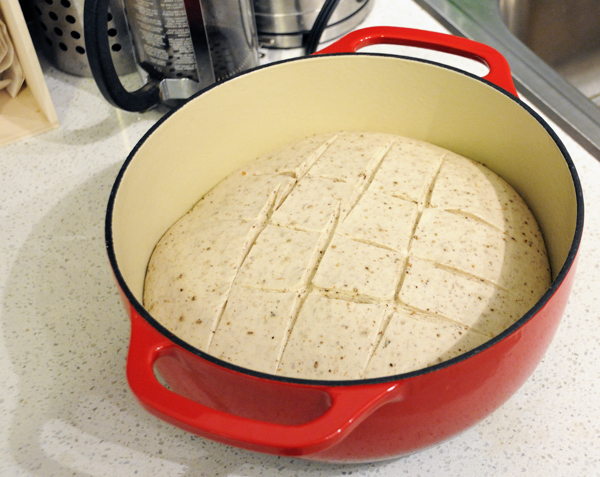
The dough is allowed to continue fermentation and proof at room temperature. The loaf is scored just before baking.
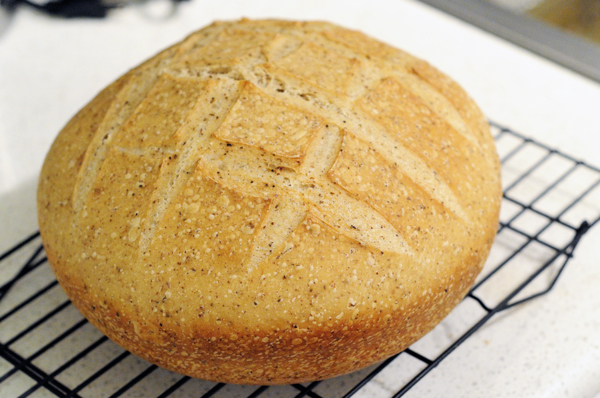
Four to six hours before baking the bread, pull the dough from the fridge. The dough may have slightly expanded in size, but will likely not have doubled. Allow the dough to continue its fermentation at room temperature until it has doubled in size. The time this takes will vary based on the make-up and health of your sourdough starter. Once doubled in size, place the covered Dutch oven into your oven preheated to 500° F. Bake bread covered for approximately 30 minutes and then uncovered for an additional 25 minutes. My stove is very unreliable and weak so your bake time will likely vary considerably. Allow the bread to completely cool before slicing and enjoying.

The bread has a fairly tight crumb which is great for sandwich bread or toast. Increasing the level of hydration in the dough will create a lighter crumb with larger holes.