Vienna Lager 4.0 Homebrew Recipe

Vienna Ready to BRewUpdate: Unfortunately, the beer didn’t place in the second round of NHC. It did get pretty good scores however. I’ve uploaded the score sheets, in case you’re curious.

You can probably tell by my history of posting Vienna Lager recipes, that I love brewing (and drinking) the style. It is a great sessionable lager, and a lot of fun to brew. With that said, brewing this batch had ulterior motives.

My last batch of this beer turned out great. Judges tended to agree as it placed in both Homebrew Alley 8, and the first round of the National Homebrew Competition. Unfortunately, the bottles I have left are starting to show their age and will be well past their prime when the second round of the NHC occurs this June. With that in mind, I decided to brew up another batch. The recipe below was brewed on 3/30/14. This is pushing the time frame that I would normally be comfortable turning a lager of this strength around in. With careful yeast management and temperature control, it should be just enough time for the mid-June second round of the competition.

Recipe

Recipe Specs:
Size: 3.24 gal
Efficiency: 68%
Attenuation: 74%
Brew Date: 3/30/14

Original Gravity: 1.052 SG
Terminal Gravity: 1.014 SG
Color: 13.97 SRM
Alcohol: 5.07% ABV
Bitterness: 24.1 IBUs
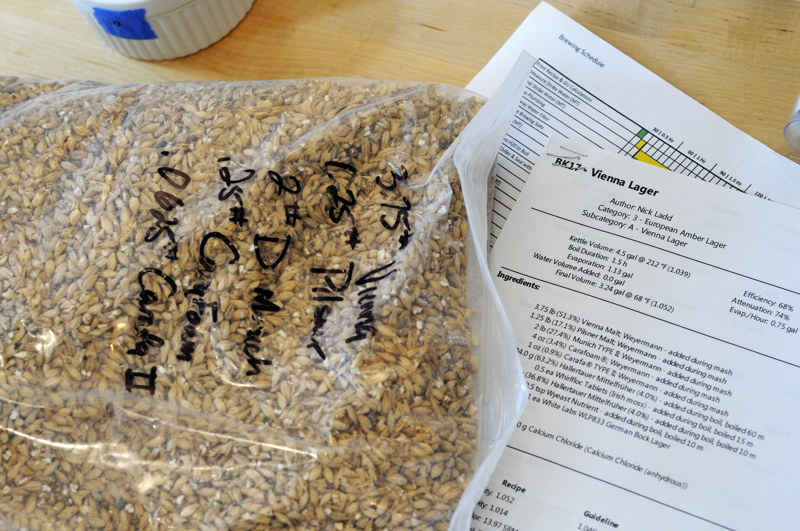
Grist:
3.75 lb (51.3%) Vienna Malt – Weyermann
1.25 lb (17.1%) Pilsner Malt – Weyermann
2 lb (27.4%) Munich TYPE II – Weyermann
4 oz (3.4%) Carafoam® – Weyermann
1 oz (0.9%) Carafa® TYPE II – Weyermann

Water Additions (in Mash):
Soft NYC Water
4g Calcium Chloride

My recipe employs a single step decoction mash.

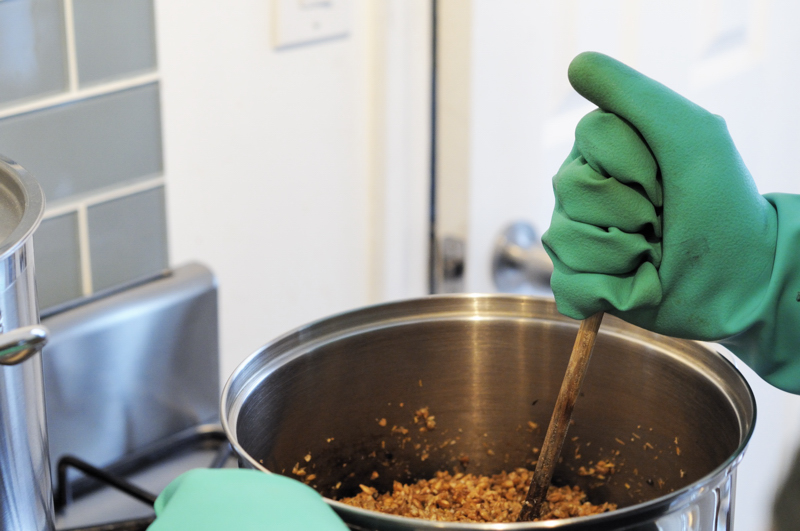
A quick single decoction enriches the malt character… and it’s a lot of fun.

Mash Regiment:
20m – 144°F Beta Rest
Decoct to Alpha Rest
20m – 156°F Alpha Rest
Direct Fire to Mashout
5m – 168.0°F Mashout Rest

Hopping:
24g Hallertauer Mittelfrüher (4.0% AA) – 60 m
14g  Hallertauer Mittelfrüher (4.0% AA) – 10 m


Kettle Additions:
0.5 ea Whirlfloc Tablet – 15 m
0.5 tsp Wyeast Nutrient – 10 m

Yeast:
White Labs WLP833 German Bock Lager – 1800ml Starter on Stirplate

Fermentation:
1. Chill to 46°F and keep at 48°F until activity slows.
2. Raise to 58°F for diacetyl rest 24 hours.
3. Cool 6°F / day until back down to 32°F.
4. Rack to corny keg and lager at 32°F 3-4 weeks.

Single Tap IPA 3.0 Recipe & Review

Over the years I’ve brewed lots of different IPAs. Lately however, I’ve been focused on developing Single Tap, my house IPA. This third generation recipe has its roots in a beer I brewed back in 2012 which won a first place ribbon in the first round of the National Homebrew Competition. Over the years, the recipe has been simplified, with the notion that every ingredient should have a justifiable reason for its inclusion. While the recipe is always changing, the heart of this beer is focused on providing a toasty, yet lean, highly-attenuated malt background and contrasting it against a ton a big American hop flavor and aroma. I am able to keep the bitterness low compared to other IPAs by pushing attenuation to the point that little bitterness is needed for balance.

Single Tap IPA 3.0 Recipe

Size: 4.32 gal – With system and trub losses, I typically end up with 2.75 gallons in the fermenter.
Efficiency: 72% (Measured)
Attenuation: 82.8% (Calculated)

Original Gravity: 1.070 SG (Measured)
Terminal Gravity: 1.012 SG (Measured)
Color: 9.71 SRM
Alcohol: 7.6% ABV (Calculated)
Bitterness: 24.0 IBUs – Calculations don’t take into account bitterness gained through whirlpool additions, which is considerable.

Fermentables:
5 lb (45.5%) – Briess 2-Row Brewers Malt
3 lb (27.3%) – Crisp Maris Otter
1 lb (9.1%) – Weyermann Vienna Malt
8 oz (4.5%) – Briess White Wheat Malt
6 oz (3.4%) – Crisp Crystal 45
2 oz (1.1%) – Weyermann Acidulated Malt – added for pH correction
1 lb (9.1%) Table Sugar – added during boil

Hop Additions:
4 g  Citra™ (13.7% AA) – First Wort Hop
0.5 oz Sterling (7.5% AA) – 10 m
0.5 oz Centennial (10.5% AA) – 10 m
2 oz Citra™ (13.7% AA) – Post Boil Whirlpool – 25 m
3 oz Amarillo® (8.7% AA) – Post Boil Whirlpool – 25 m
1 oz Centennial (10.5% AA) – Post Boil Whirlpool – 25 m
0.5 oz Sterling (7.5% AA) – Post Boil Whirlpool – 25 m

0.5 oz Centennial (10.5% AA) – Dry Hop 3 Days
1.5 oz Citra™ (13.7% AA) – Dry Hop 3 Days
1.5 oz Amarillo® (8.7% AA) – Dry Hop 3 Days

Kettle Additions:
0.5 ea Whirlfloc Tablets – 15 m
0.5 tsp Wyeast Nutrient – 10 m

Yeast:
WYeast 1056 American Ale™ – 1600ml 1.040 starter on stir plate.

Water Additions:
Soft NYC Water
6g Gypsum (Calcium Sulfate)
2g Calcium Chloride

Mash Regiment:
Saccarification Rest – 149° F, 60m
Mashout Rest – 168° F, 5m

Single Tap IPATasting Notes:

Judged as a BJCP Category 14b American IPA

Aroma (11/12)
Putting your nose in this glass unveils a cornucopia of hop-derived fruit aromas. Most obvious is the mango, but there are also big notes of orange, tangerine, and a hint of peach. There is just a touch of grassiness and pine resin. Underneath the hops, there is a light hint of toasty and bready malt. Very clean. Not alcohol or other off-aromas.

Appearance (3/3)
Beer is a slightly hazy and light copper in color. The glass is capped by a frothy white head of exceptional persistence and lacing.

Flavor (15/20)
This beer is bursting with bright hop flavor. There is tons of citrus, some tropical fruit, and just a touch of grass. The beer is extremely dry, but the ripe fruity hops give a slight perception of sweetness. Bitterness is considerably less than most commercial examples and could be bumped up just a touch. Underneath all of the hops is a moderately toasty and bready malt component which is quite nice. The hop flavor carries through and lingers a touch in the finish.

Mouthfeel (5/5)
Medium bodied with a very nice creaminess that finishes clean. Moderate carbonation.

Overall Impression (8/10)
This is the best iteration yet of my constantly evolving IPA recipe. The dryness of the beer melds well with intense juicy hops achieving a balance that makes the beer extremely quaffable. While it could use just a hair more bitterness and perhaps even a touch more dryness, the beer in the glass is a wonderful example of the style. This homebrew easily stands up to the best commercial examples.

Total: 42/50 Excellent

Reviewing My King Henry Clone Attempt

color

Goose Island Bourbon County Barley Wine on the left, homebrew variations in the middle and right.

Late in September 2013, I took a shot at brewing a clone of Goose Island’s King Henry barrel aged barley wine. The beer was left to rest on oak cubes which had been soaked in different spirits (Weller 12 Bourbon and Christian Drouin Calvados). After about 3 months on oak, I packaged the beer in individual bottles and decided to taste them blindly against Goose Island Bourbon County Barleywine — the closest beer I could track down that would resemble King Henry.

Rather than do an extensive review of each beer, I’d like to focus on the elements that are clearly different. The recipe I used came directly from Goose Island’s brewsheet for King Henry, so I am relatively confident in the grist make-up and hopping. That being said, I definitely did not achieve a clone due to the various reasons outlined below.

vertBarrel Character
The biggest thing separating my beers from the commercial example was the dramatic difference in barrel character. The Goose Island beer is extremely rich, with robust amounts of vanilla, toffee, and even a bit of sweetness coming from the barrel. Comparatively, the homebrew was almost thin, with a one-dimensional raw woody character that was dramatically different. I went through an exercise of adding slight amounts of bourbon back to the homebrewed beer, and while it helped, the character it imparted was more spirit-like in its booziness and lacked the depth and roundness of barrel notes the commercial beer contains. I’ve always been aware of the dramatic differences between simulated barrel aging, and actual barrel aging. Having these two beers side-by-side made this difference extremely obvious.

Yeast
The only real omission from the brew sheets I formulated my recipe off had to do with yeast selection. I ended up using Wyeast 1098 British Ale which left my beer with a distinct ester character, not found in Goose Island’s beer. My beer had much more British character than the Goose Island product. For the next iteration of this I brew, I will definitely be revisiting my yeast choice.

Color
The commercial example I am comparing my homebrew against is considerably darker in color. Previously I had discounted the statement I’ve heard in the past that the commercial beer picks up some color from the imperial stout which previously resided within the aging barrels. It’s tough for me to explain the color difference, so perhaps there is some truth to this.

While I wasn’t able to clone the beer, I still ended up with a really nice brew. It is somewhat one-dimensional in its oak character which I hope will evolve a bit with some age. The biggest take-away for me is that there truly is no substitute for genuine barrel aging. For my next iteration, I plan to obtain a 5-gallon whiskey barrel and see if I can get closer to the barrel character that Goose Island is able to achieve.

Fun with Fermented Veggies – Sauerkraut

Sauerkraut, pork sausage, German potato salad, with some grainy mustard.

Sauerkraut is a great accompaniment to many different dishes. I like it best as a traditional side served with pork sausage, German potato salad, and some grainy mustard. Serve it with a stein of Munich Helles and you’ll be good-to-go.

Making sauerkraut seems like something that should be difficult. In reality, it is just about as easy as it gets in terms of food fermentation. I was inspired to begin fermenting vegetables after reading Sandor Katz’s book The Art of Fermentation. Sauerkraut is an excellent introduction and foray into the rabbit hole that is food fermentation.

Cabbage and salt. About as simple as it gets.

Sauerkraut ingredients ready to go.

Sauerkraut is shredded cabbage and salt that is mixed and allowed to ferment using the natural microflora present on the cabbage. There are a million variations which typically include the addition of different spices and perhaps other vegetables. You can go nuts trying different styles of kraut, but a simple version with just cabbage and salt is pretty delicious in its own right. The key, like most fermentation, is setting an environment that is conducive to producing a good, lactic fermentation, and not spoilage.

The first step is to take a head of washed cabbage and shred it finely. It is then mixed in a bowl with an ample amount of salt. I prefer coarse Kosher salt, but the type doesn’t really matter. Typically the amount of salt should equal approximately 1.5 – 2% of the cabbage’s weight. This is a general rule of thumb; experiment to see what best suits your taste. I generally don’t weigh the salt and instead sprinkle salt in between alternating layers of cabbage.

Once the salt and cabbage is mixed I manually compress and crunch the cabbage to allow the salt to draw water out of the cabbage. It is very important to draw out enough moisture so that it completely submerges the cabbage.

Once the cabbage begins giving up its moisture, it is time to pack it into a jar or bowl. I’ve found the easiest thing to do is pack it into a stainless steel mixing bowl. I then lay plastic wrap right on top of the cabbage and push out any air pockets. Your goal is to encourage lactic acid bacteria to ferment the cabbage by denying other microbes access to oxygen. The moisture in the cabbage mixture and plastic wrap seal should keep out most oxygen. On top of the plastic wrap I set a plate with a couple cans on top in order to further compress the cabbage and keep it submerged. Lastly, I cover the entire top with a piece of cheese cloth to keep out any fruit flies.

After amount a week, I like to taste the kraut. It should have picked up a nice tartness and be relatively clean tasting. If there is dark or oddly colored mold or putrid off-smells, it may have gone-off and should be tossed. That being said, I’ve never had a batch of kraut go off. Common sense should dictate your decisions. If it smells off, then you probably don’t want to eat it.

The final product ready to eat.

The final product–ready to eat after a week or so.

With a week of fermentation, the kraut will still be pretty crunchy and only mildly sour. The more time you give it at room temp, the tarter it will become. Once it is at a level you like, it is best to refrigerate it to retard any further fermentation. Once in the fridge, it should stay good for at least a couple months.