The Beer
 Whirlpool hopping is a technique used in some of the best hoppy beers in the world. For those less-than-familiar with this technique, it is essentially equivalent to the ‘0 minute’ addition homebrewers use. In many professional breweries, kettles (or in some cases a separate whirlpool vessel) is used to spin the wort directly after flame out to collect trub and other particulate matter in the center of the vessel while drawing clear wort off of a side mounted port and sending it on the the heat exchanger and fermentation vessels. Somewhere along the line a brewer discovered that they could toss hops into the kettle during this process and create some very nice hop flavor and aroma.
There is little doubt among brewers that whirlpool hopping helps bring massive hop flavor and aroma to the finished beer. The big debate happens when you try to quantify the bitterness that is attributable to these additions. Some brewers (and pieces of brewing software) would imply that there is no isomerization of alpha acid at these less-than-boiling temperatures and therefore the amount of bitterness attributed to these additions is negligible. Others claim that it is equivalent to a 20 minute hop addition in terms of bitterness.
I tend to fall somewhere in between. To me, 20 minute addition equivalency makes the most sense in relation to brewing on a commercial scale. Many commercial breweries can take over an hour to knock out from kettle, through a heat exchanger, and into fermentation vessels. Large commercial kettles have a massive heat capacity that is much greater than what I’ve experienced on the homebrewery scale. Most homebrewers lose heat and knock out much more quickly than their commercial peers. It makes sense to me that since you’re keeping the wort hotter longer on the commercial side that you would get more isomerizaton of alpha acid than on the homebrewery scale. To test this, I devised a simple session pale ale that would use whirlpool hops almost exclusively. There is a small 60 minute charge that was designed mainly to prevent boil-overs and help with protein coagulation.
Maiden BK Pale Ale
Size: 3.0 gal
Original Gravity: 1.049
Terminal Gravity: 1.012
Color: 8.53
Alcohol: 4.84% ABV
Bitterness: 19.2 (calculated by Beer Tools).
Ingredients:
5.75 lb (78.6%) Pale Ale Malt – Rahr
1.5 lb (20.5%) Vienna Malt – Weyermann
1 oz (0.9%) Acidulated Malt (PH adjustment)
.25 oz (8.3%) Citra™ (14.1%) – added during boil, boiled 60 m (19.2 IBU)
1 Whirlfloc Tablet (Irish moss) – added during boil, boiled 15 m
.5 oz (16.7%) Simcoe® (13.2%) – whirlpool 30 minutes
.5 oz (16.7%) Simcoe® (13.2%) – whirlpool 30 minutes
1.75 oz (58.3%) Citra™ (14.1%) – whirlpool 30 minutes
WYeast 1056 American Ale
Mash 155 °F
Ferment: 66 °F
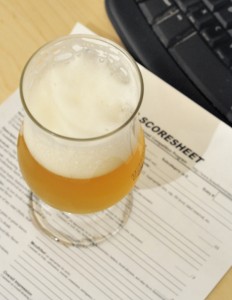
The Tasting
 There is little doubt in my mind that this beer is more bitter than the 19 IBUs Beer Tools estimates it to have. There is a considerable, but smooth bitterness that balances quite nicely with the malt. Beer Tools calculates this to be a whopping 145 IBUs if I assign the whirlpool hops the same utilization as a 20 minute addition. If I calculate it as a 10 minute addition, it calculates out to 92 IBUs. If I calculate the whirlpool hops as a 5 minute addition it puts the total at 58 IBUs. I would estimate the bitterness in this beer to be between 50 and 60 IBUs, so according to Beer Tools it is roughly equivalent to a 5 minute boil addition. Of course, there are so many variables involved that it is tough to transfer this logic to other beers. That being said, it unequivocally proves to me that whirlpool hopping contributes a significant bitterness to beers which cannot be ignored in recipe formulation.
Judged as a BJCP category 10A American Pale Ale.
Aroma (5/12)
Big hop aromas of mango, tangerine, along with pineapple jump from the glass. I could swear that this beer was dryhopped had I not known better. The giveaway is that there is none of the grassiness typically attributed to dry hops. There is a hint of honey-like malt sweetness which compliments a low toasty malt note. There is a bit of a distracting butterscotch aroma. It doesn’t present in the traditional ways I’ve perceived diacetyl, but it is certainly a possibility.
Appearance (2/3)
Golden with a light haze. Big white head. Some of the best head retention and lacing I’ve ever seen. I suspect this is due to the large hop charge in the whirlpool. Too light in color for the style.
Flavor (13/20)
Hop flavor dominates. Lots of sweet orange peel that combines with the butterscotch perceived on the nose giving it a sweet impression. The malt is crisp and clean. The toasty Vienna notes are slight and not as strong as I would have anticipated. Bitterness is moderate and balanced. Could use a slightly coarser bitterness to better fit as an American Pale Ale.
Mouthfeel (4/5)
Medium body with a clean crisp finish. Bright and lively carbonation.
Overall Impression (5/10)
This is a nice bright sessionable pale ale. Hops are dominate and could use a little more diverse malt character to better fit the category. The malt is crisp, yet one dimensional. The distracting hint of butterscotch could be diacetyl, although it doesn’t quite present like any diacetyl I’ve tasted before. I suspect that if it is diacetyl it was due to pitching and fermenting too cold and then dropping the temperature of the ferment before the yeast had finished metabolizing all fermentation byproducts. I would like to brew this beer again, paying more careful attention to yeast health, bumping up the bitterness, and perhaps giving it a touch more malt diversity. In the end however, it is a very sessionable and balanced pale ale.
Total: 29/50 (Good)