The Brooklyn Pour Preview

Note: Tickets are officially sold out.

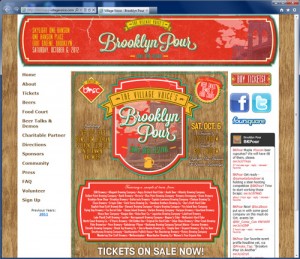
A week from today (October 6) I’ll be heading over to the old Williamsburgh Savings Bank Tower building in Fort Greene, Brooklyn to attend the Village Voice’s 2nd Annual Brooklyn Pour. This event boasts 65 different breweries plus food, entertainment, and seminars over the course of two 3-hour sessions (1-4pm, 6-9pm). The general admission cost is $45 and includes unlimited samples (within reason). VIP admission (which includes complimentary food, a gift bag, access to a special mezzanine and special drinks) is also available for $65.

The Beer

Brooklyn Pour’s website boasts an impressive number of breweries. Most of these are within the tri-state area along with a handful of breweries from across the states, as well as a few international breweries. The Village Voice currently does not have a list of the beers being poured. Fortunately, The Pour Report was able to contact some of the attending breweries and get information about what they would be pouring. Please note that this list isn’t 100% inclusive and is subject to change. If you’re a brewer coming to the event and would like your information posted here, please contact me and I’ll add it.

Allagash Brewing, Portland, ME

  • White
    Our interpretation of a traditional Belgian wheat beer. Brewed with a generous portion of wheat and spiced with coriander and Curacao orange peel, this beer is fruity, refreshing and slightly cloudy in appearance.
  • Black
    Allagash Black is a Belgian style stout brewed with 2 Row barley, torrified wheat, oats, both roasted and chocolate malt and a generous portion of dark caramelized candi sugar. The silky mouth feel is a great balance to the roasted character, coffee and dark chocolate notes expressed throughout this beer.
  • Curieux
    Allagash Curieux was the first foray into barrel aging. Curieux is made by aging our Tripel Ale in Jim Beam bourbon barrels for eight weeks in our cold cellars. The aged beer is then blended back with a portion of fresh Tripel. The resulting beer is soft with coconut and vanilla notes, with hints of bourbon.

Blue Point Brewing Company, Patchogue, NY

  • Toasted Lager
    Our flagship Toasted Lager still has the same toasted flavor it was named for. Copper in color, our most popular and unique brew is made from six different malts, including English Pale, Crystal, Munich, Carapils, Wheat, and Belgian Caravienna. Toasted Lager’s balanced flavor of malt and hops makes for easy drinking and the special lager yeast we use produces an exceptional, long-lasting smooth finish.
  • Hoptical Illusion IPA
    Our classic, American-style India Pale Ale (IPA) features a rare hop grown exclusively on a small farm in Oregon. One taste and you’ll understand why we bought the entire crop. Our Hoptical Illusion IPA is brewed with a generous amount of this select hop that’s added five different ways for maximum hop flavor.
  • RastafaRye Ale
    A hearty rye malt, blended with fresh West Coast hops resulting in a delicious, deep copper ale with just the right amount of rye flavor to offset the spicy, floral characteristics of the hops.
  • White IPA
    Our White IPA is an unfiltered European-style white ale with a fresh American IPA finish. Brewed with malted and unmalted wheat and just the right amount of west coast hops, it’s fermented with German yeast to give it a perfectly balanced character with less bitterness than traditional IPAs.

Brooklyn Brewery, Brooklyn, NY

  • Defender
    Limited edition beer brewed for NYC Comic Con. Hoppy Amber IPA.
  • Fiat Lux
    What are we drinking this summer? Combining Canadian and American malts with a large proportion of un-malted white winter wheat, Fiat Lux starts with a Belgian witbier inspiration. A blend of Pacific Northwest hops, a little lime peel and a dash of Indian coriander brings a bright blast of citrusy aromatic sunshine, while German Perle hops supply a nice big zap of refreshing bitterness.

Captain Lawrence Brewing Company, Pleasantville, NY

  • Pumpkin Ale
    This is the perfect beer to drink as the weather starts to turn a bit cooler. Brewed with pureed pumpkins added directly to the mash and traditional pumpkin pie spices add to the end of the boil, this beer packs a ton of flavor into a malty and smooth amber-colored ale.

Cisco Brewers, Nantucket, MA

  • Whale’s Tale Pale Ale
    English style pale ale. Cisco’s flagship beer. Wonderfully balanced with Maris Otter malt, hints of crystal malt and generously hopped with East Kent Goldings, it has a rich honey color and fruity hop aroma. It is named in honor of Nantucket’s whaling history.
  • Grey Lady Ale
    Named for the often foggy island where it is brewed. This wheat beer is fermented with Belgian yeast and brewed with fresh fruit and spices. A unique ale that emits a complex, earthy nose and a soft, mid-palate maltiness with hints of tropical fruit. Dry and spicy.

Doc’s Draft Cider, Warwick, NY

  • Apple Cider
    This cider is semi-dry and wonderfully effervescent with a remarkably fresh apple nose. Its crisp, fruit forward taste and a clean, refreshing finish, have won our cider countless awards and praise.
  • Pumpkin Cider
    A seasonal cider made with roasted pumpkins, cinnamon, allspice, fresh ginger and nutmeg.

Dogfish Head, Milton, DE

  • Raison D’etre
    A deep mahogany, Belgian-style brown ale brewed with beet sugar, raisins and Belgian-style yeast.

Element Brewing Company, Millers Falls, MA

  • Extra Special Oak
    Pouring the beer in the glass unleashes notes of vanilla bean and spice with an underlying aroma of rich malt. Layers of flavors follow, from toasted coconut to warm bread to green tea. Full body, this beer will pair nicely with mild charcuterie and soft rind cheese.
  • Red Giant
    Lush English hop varieties balanced with luxurious English malts meld together in this deeply flavored ale. At its core it is food-friendly approachable and makes a style all its own. Pairs well with grilled meat and salty cheeses.
  • Dark Element
    Strikingly viscous and creamy on the palate with citrus fruit and chocolate cream, Dark Element offers enormous density yet preserves the balance that is a hallmark of Element Brewing Company. Use this ale to contrast spicy and acidic foods.
  • Altoberfest
    The current seasonal that we will be pouring is “Altoberfest” it is currently ranked 2nd in the world on Beer Advocate for Oktoberfest style. This fall seasonal, blends the assertive hop character of a classic German Alt with the malt qualities of a traditional Oktoberfest. Fermented with our house ale yeast you will find this ale a superior companion to the fall.

KelSo Beer Co, Brooklyn, NY

  • Barrel Aged Porter
    Malty, chocolatey, with vanilla and rum notes and 6.5% ABV.
  • Kellerfest
    Mellow, light toasted malt, and clean finish at 6% ABV.

Ommegang, Cooperstown, NY

  • Witte
    Wheat ale with spices, sweet orange peel, and coriander. Traditional Belgian-style wheat ale. Flavorful, soft and hazy. A drink of the sun, Witte was made to refresh and restore.
  • Hennepin
    Ale with spices. Grains of paradise, ginger, coriander and sweet orange peel. Hearty and rustic golden ale, full-bodied, hoppy and crisp. Hennepin was made to quench your thirst for the unknown.
  • Three Philosophers
    98% Ale – 2% Ale with cherries added. Unique blend of Ommegang Quadruple and Liefmans Kriek. Three Philosophers was made for contemplation.

Victory Brewing Company, Downingtown, PA

  • Prima Pils
    Heaps of hops give this pale lager a bracing, herbal bite over layers of soft and smooth malt flavor. This refreshing combination of tastes makes Prima a classy quencher in the tradition of the great pilsners of Europe.
  • Headwaters Pale Ale
    Our brewery is blessed with exceptionally pure water that travels just over a dozen wooded miles to reach our brewery. With this pristine water we have transformed floral American hops and subtle, crisp German malts into a refreshing delight.
  • Golden Monkey
    Strong and sensual, this golden, Belgian-style ale glows. The richness of German malts and Belgian yeast are tempered by a sparkling approach and overall light body. Abundant herbal, fruity notes make Golden Monkey® one to savor.

Weyerbacher, Easton, PA

  • Merry Monks
    Belgian-Style Tripel. Pilsner malt combined with an abbey yeast strain yields a remarkable and complex flavor packed with notes of spice, banana and pear. Nicely balanced, with a moderate to dry finish, Merry Monks is bottle conditioned creating a special effervescence and a creamier carbonation.
  • Last Chance IPA
    A full-flavored (West Coast style) hop assault delightfully lacking in balance. We’ve added a combination of Centennial, Cascade, Simcoe® and Columbus hops to produce aromas of grapefruit, pine and citrus. This beer was first released in June and is now available as a year-round release in 5 markets. A portion of the proceeds from sales of this beer goes to an animal rescue organization.

The Crowd and Venue

With 1,500 people attending per session and no limits on the number of pours, I expect this to be quite an enthusiastic crowd. The 60+ breweries in attendance should help minimize lines with exception of those breweries that manage to generate a buzz (pun intended). Skylight One Hanson is a beautiful venue that promises a great beer festival environment.

Are you planning on attending? What are you most looking forward to? Stay tuned for my post-event wrap-up!

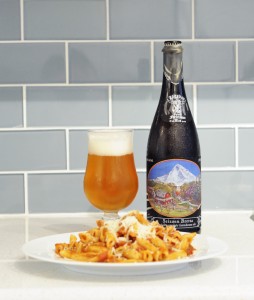
Penne Paired with Logsdon Farmhouse Seizoen Bretta

Penne and Logsdon Farmhouse Seizoen Bretta

Fresh Pasta and Seizoen Bretta

Reminiscing about a past you have never actually experienced can be an interesting experience in itself. Your mind tends to create a utopian image of the way people used to live and instill upon your current psyche a sense of loss for something you never had. Whether it ever existed or not, my mind likes to go to a place in the not-so-distant past where people sourced products from those who were experts in a particular trade and whose knowledge of their craft was both a matter of personal pride and value to their customers. Our busy lives make this type of product sourcing difficult (as does the cost). The ubiquitous all-in-one-vegetable-hermetically-sealed-vacuum-packed-meat-deli-baker-green-grocer is an easy, and in many ways, logical option. With that said, I look fondly on those quiet mornings when nothing dire needs my attention and the sun and blue sky beg me to take a walk and pick up the products I need for that evening’s dinner. This particular Sunday morning started with the craving to make a pasta dish similar in some respects to the spaghetti with meat sauce my grandma made when I was growing up and that my wife (and many other family members) love.

Washington Park Sunday Market

Picking up my basil at the Washington Park Farmer’s Market

The day started with a short stroll from my apartment to the Sunday Farmer’s Market held at Washington Park. (Fun Fact: Washington Park was home to the Brooklyn baseball club which would later move to Ebbets Field and become my beloved Dodgers.) Here I scored a large bunch of fresh basil for $2–a steal by New York (or really any) standards. Basil in hand (along with some awesome sourdough bread from Orwashers bakery) I headed over to Cobble Hill.

My next stop was to pick up the meat for my sauce at Los Paisanos Meat Market.

Los Paisanos

Los Paisanos Meat Market


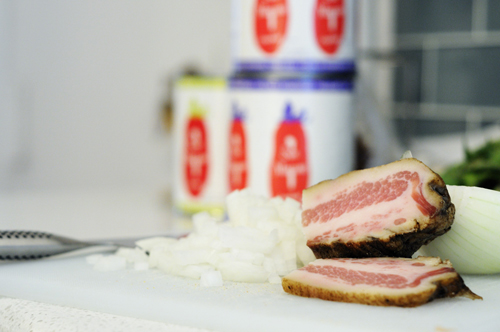
Los Paisanos–a Brooklyn institution for over 45 years–provides great meat, fresh pastas, cheese, and many other Italian specialties. The main reason I came here was to obtain some guanciale, which would form the heart of my sauce. Guanciale is a lot like bacon, but uses the hog jowl rather than belly and is not smoked. The jowl is much fattier than the belly and has a more pronounced porky flavor. This would be the base for my sauce, providing delicious fat and a rich cured saltiness. While there, I rounded out what I needed for the sauce, picking up canned San Marzano tomatoes, a well-aged Parmesan cheese, and housemade ground beef mix.

The Process

Guanciale

Guanciale

I began by cubing up a chunk of guanciale about half the size of my fist. I threw it into a heavy sauce pan and rendered out about half of the fat. I then added a diced yellow onion and sweated it out. From there, I added a pound of freshly ground beef and browned it. Next went in three 28 oz. cans of crushed San Marzano tomatoes, which were left to cook under very low heat for about 4 hours. With about 30 minutes left I added a handful of chopped basil and adjusted the seasoning with some kosher salt and pepper, as well as a splash (or three) of red wine vinegar. The fresh penne pasta that I purchased from Los Paisanos was boiled in water for about 4 minutes before cooking for another 3-4 minutes in the actual sauce. The plate was finished with some freshly ground aged Parmesan cheese and paired with Seizoen Bretta from Logsdon Farmhouse Ales.

So, was the pairing any good?

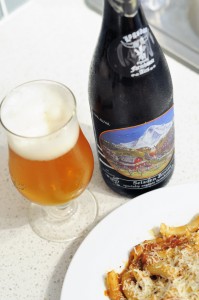
Penne and Logsdon Farmhouse Seizoen Bretta

A lovely pairing

This was a wonderful pairing. The Parmesan cheese that was used had a nice fruitiness as well as an earthy undertone that sang wonderfully with the earthy brett used in the saison. Additionally, the saison was very effervescent and had a firm bitterness than created a nice interplay with the fairly rich and flavorful sauce. The only negative aspect was that the beer had a bit of a plastic / peated scotch phenol, which was a little harsh and stuck out a bit from the overall harmony of the pairing.

Brewing in Tight Spaces (and you can too!)

This topic has been on my mind for a long time. It is especially important now as I begin evaluating my old brewing process in the hopes of building a better brewery, customized to fit my new Brooklyn home. This post is meant to be an overview of my previous brewing process, which demonstrates that you can brew award-winning beer in the kitchen on your stovetop. This article is intended for brewers with a basic understanding of the brewing process and the terms associated with it. If you’re completely new to brewing, I highly recommend John Palmer’s book How to Brew to get you started.

The Kitchen Brewery

The Kitchen Brew House

The kitchen brewery

Kitchen brewers are often written off by long-time brewers (with more advanced systems) on the premise that those still working in the kitchen are neophytes producing inferior beer with extract and steeped grains. I agree to a certain extent. If you want to be producing the best beer possible, pre-formulated extracts whose sugar composition and quality is unknown adds an unneeded obstacle to producing great beer. Like cooking, starting with the best quality product in its least adulterated form typically leads to superior results. This is a brief overview of my kitchen brewery and how it worked for me. If you have questions, I’d be happy to elaborate on any part of this in the comments section below. This article is written in the past tense because I haven’t actually brewed this way since June 2012 and my new brewing process, while possessing many of the same procedures and equipment, will be adapted to my new location (as should anyone’s process).

Yeast

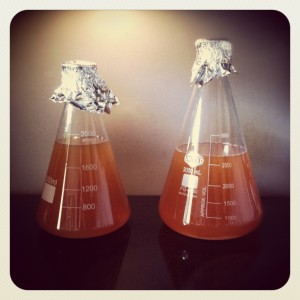
Erlenmeyer Flask Starters

Erlenmeyer flask starters

My brewdays were never a brew day (singular). Each batch always began several days in advance with yeast propagation. The first step was acquiring the freshest yeast I could get, either online or through my local homebrew shop. (Always check the dates on the packages.) In many cases, especially with less-popular strains, the yeast your shop is selling will be well past its prime. Yeast viability drops at alarming rates. Use the freshest yeast you can find, even if that means not supporting your local shop and going online. Once I had acquired fresh yeast, I would then build an appropriate starter–based on the gravity of the beer, its volume, and the freshness of the yeast sample. For ales, 1 million cells per milliliter wort per degree plato is the commercial standard. I could often get by with less than this, but the commercial standard is something to strive for. Erlenmeyer flasks are great for creating sanitary starters because the wort can be mixed and boiled in the heat-resistant flask, cooled, and then pitched with yeast all in the same vessel. I did all of my propagation on a stir plate, which increases the yeast growth curve and limits the volume of wort you need to create to hit your target pitching rate. I always timed my brewdays so I could chill the starter and decant the spent beer off the yeast culture before pitching. MrMalty.com has a great pitching rate calculator to help you size your starters.

Mash

10-gallon Igloo Mash Tun

10-gallon mash tun with false bottom

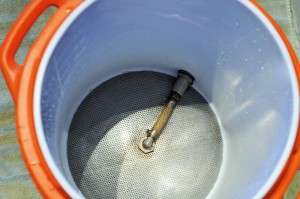
Typically a brewday began by filling my 8-gallon stainless steel kettle outfitted with a ball valve and dial thermometer with the mash strike water. Water was dispensed from my kitchen faucet, which had an inline carbon filter installed. The filter removed the chlorine and chloramines found in most municipal water sources and prevented the need for campden tablets or bottled water. The strike water was then heated on a flat ceramic stove top. The flat top stove was nice because I could straddle two burners with my kettle and come up to temperature in a reasonable amount of time. (This is something my new accommodations do not have and is a hurdle my new brewery will need to overcome.) Once the predetermined volume of water was heated to the proper temperature, it was transferred via gravity to a 10-gallon Igloo cooler fitted with a ball valve and stainless steel domed false bottom. In order to save time on my brewday, limit the mess in my kitchen, and limit the amount of equipment I needed, I always bought my grain pre-milled.

Draining the Mash Tun

Draining the mash tun

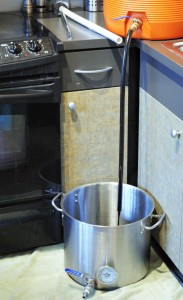
The milled grain was added to the strike water along with adjustment salts creating my mash. While the mash conversion was happening, I would heat my sparge water in a separate 5-gallon stainless steel kettle to a predetermined temperature; usually high enough to get the grain bed up to mash out temperatures of 168° F or so. After the mash was complete, I recirculated the runnings until they were clear (vorlauf), using a pitcher and then drained the entire mash tun into my 8-gallon kettle. After completely draining the mashtun, I typically did two batch sparges until my preboil volume was hit. It is important to get to know your system and how different mash thicknesses and volumes of sparge water affect your system’s extraction efficiency. Once you have a good idea of what kind of efficiency you should expect with a given recipe, hitting your targeted gravity numbers becomes routine.

Boil

Wort Coming to a Boil

Wort coming to a boil

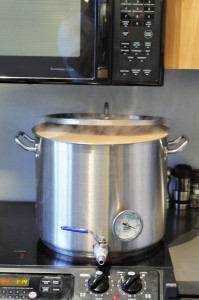
With all of the mash runnings collected in my 8-gallon kettle, I would take a pre-boil gravity reading using a refractometer to see if the amount of extract I achieved was in line with the predicted extract based on the efficiency I used for the recipe. The gravity of the wort can be multiplied by the volume of wort to calculate the total number of gravity units (GUs) in the kettle. This could then be compared to my recipe’s total gravity units (expected gravity x final expected volume) to see whether I had too much or too little sugar extract. From there, I would either add dry malt extract to the wort or revise my boil length (and hop additions) so that at the end of the boil I would be at the proper starting gravity. Ray Daniels, in his excellent book Designing Great Beer, has a chapter on using gravity units as a means to hit your target gravities. Again straddling two burners, my wort was boiled for a predetermined amount of time and hops were added at recipe-determined quantities and intervals. I typically kept the kettle lid on until the boil was achieved in order to save time as the wort came up to temperature.  Additionally, I used a silicone based anti-foam agent to (mostly) prevent boil-overs.

Chill

Chilling the Wort with a Copper Chiller

Copper chiller cooling the wort

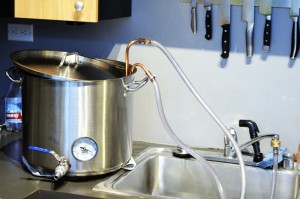
After the boil was complete, I turned off the stove and placed a copper wort chiller into the boiling wort for 5 minutes to sanitize it. The copper chiller was plumbed to the faucet on my sink using a threaded adapter. During the summer months when the ground water temperatures were too warm to effectively chill the wort to pitching temperatures, I would use a submersible pump and bucket of ice water to circulate chilled water through the copper coil after the wort had been chilled to 130° F with tap water alone. After chilling, I typically let the trub in the kettle (hops and cold break) settle for 45 minutes or so before racking clear wort into a pre-sanitized Better Bottle. I would then hit the wort with 60 seconds of pure oxygen through a diffusion stone and pitch my yeast.

Ferment

Lid on Fermentation Chamber

Styrofoam lid fabricated for fermentation chamber

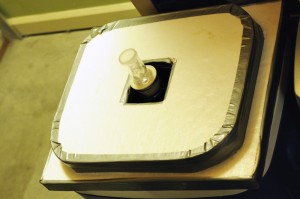
Fermentation took place in an Igloo Ice Cube cooler with a custom-fit styrofoam lid that I fabricated. The lid allowed for an airlock or blow-off tube to come through the top while effectively sealing the cooler. The cooler was filled with water (with a touch of bleach) in which I put a floating thermometer and blue ice packs that I’d rotate in and out to achieve a fine degree of temperature control. Fermentation would typically go for about a week depending on the yeast strain, gravity, and fermentation temperature. At the end I would typically crash the fermenter as cold as my setup would allow to encourage any remaining yeast in suspension to flocculate out.

Package

After fermentation I would rack my beers into clean, sanitized, and CO2 purged corny kegs. From there they were placed into a chest freezer controlled by a Johnson A419 temperature controller and force carbonated using pressurized CO2 and a regulator. Beer was dispensed from a two tap kegerator sitting in my living room. Beers needed for competition were filled carbonated using a Blichmann Beer Gun.

Small Doesn’t Mean Sloppy

Hop Additions Ready for Kettle

Hops are carefully weighed and labeled

In some ways, having a small, simple brewery allows you to focus on process rather than the equipment involved. Each step of the brewing process has control points which can be checked along the way to see if the brewday is progressing according to plan. With that in mind, things can always go differently, so it is important to know how to roll with these changes and adjust your brewday to sync with whatever might happen. Expense was not spared in acquiring accurate hydrometers, refractometers, and thermometer–giving me confidence in the numbers I was checking. Additionally, these instruments were frequently calibrated to ensure their accuracy. Pre-boil gravities were checked and adjusted in order to hit the gravities I was targeting. Temperatures on the fermentation side were tightly controlled to insure quality fermentations. Sanitation was of primary importance with all items on the cold side being thoroughly cleaned and sanitized. Recipes were thoroughly researched and designed to achieve the end product I wanted to obtain.

Where My System Worked

My old home in Seattle was small. The only place I was able to brew was in my kitchen as I didn’t have adequate outdoor space. In the end, this made many of my brewdays more pleasant, especially when it was freezing cold or burning hot outside. I literally lived in my brewery and brewing was always on my mind.

Where My System Sucked

Time. Waiting for items to come to a boil. Waiting for items to cool. Waiting for trub to settle. These were all things that dramatically increased my brewday lengths and something I hope to improve on in my new brewery.

Baby-sitting. My fermentation temperature control using a water bath required baby-sitting a couple times a day. I hope to automate this in my new brewery with a temperature controlled mini-fridge.

Labor. 10-gallon mash tuns filled to the brim are heavy. This becomes all the more precarious when you’re lifting it 3 feet from the ground to the kitchen counter. My next brewery design will take advantage of a pump to transfer liquid.

Mash Temperature Control. Correcting a missed mash temperature on my old system involved a frantic and imprecise scramble of either adding boiling water or ice to the mash in order to bring the temperature into line with what the recipe dictated. My next brewery will have some sort of built-in mash temperature control.

A Brewery I Respect

It seems that the homebrewer and DYI gadget crowds often overlap. There is a lot of conversation happening about ways to trick out your brewhouse, improve the quality of your beer, and expand your brewery’s output. A lot of people push these upgrades without really first understanding that technology and final quality are not implicitly connected. They spend more time chasing upgrades than understanding brewing fundamentals. For certain types of personalities, this is fine and represents a big chunk of the joy of the hobby.

At first glance, my friend at Black Alley Brewing might have fit this description.  He has the most technologically advanced homebrew rig I’ve ever seen (in person). The degree of control he has is vastly superior to most commercial brewing systems I’ve seen of less than 30 barrels. That being said, every aspect of his design was well thought-out and had specific reasoning geared towards quality, time, or ease-of-use. Each part of the brewery was designed with purpose and not for the sake of gadget wizardry alone. It is an amazing thing to behold and something I greatly respect as a brewer. You can check out his build, which was thoroughly documented here: Black Alley Brewing.

Troegs Perpetual IPA Review

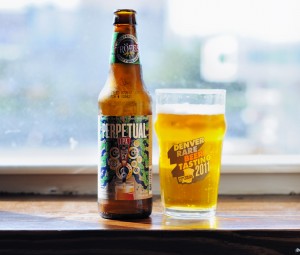
Troegs Perpetual IPA

Perpetual IPA on a Sunny Brooklyn Afternoon

East coast IPAs are frequently eclipsed by their hoppier west coast cousins. This was especially true a couple of years ago, before wildly popular beers like Heady Topper and various offerings from Hill Farmstead stormed the national beer stage. Of course, like all generalizations, there are certainly exceptions. More and more east coast breweries are shifting production towards the market’s demand for over-the-top hop aroma and flavor and producing beers like Perpetual IPA; a beer that makes the west coaster in me feel right at home.

Beer Data:

Purchased: 9/10/12 at a neighborhood bodega – $14.99 / 12oz. 6 pack
Availability: Year-round (according to Troegs’ website)
Bottle Date: 7/2012
Alcohol: 7.5% ABV

Commercial Description from Website:

In our constant evolution as a brewery, we’ve developed an undying drive to meld the organic and the mechanical. Perpetual IPA utilizes our hopback and dry-hopping to engineer a bold Imperial Pale Ale. It features Bravo, Chinook and Mt. Hood hops in the boil, Mt. Hood and Nugget hops in the hopback, and is further dry-hopped with Citra and Cascade hops.

Tasting Notes:

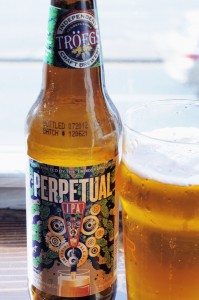
Troegs Perpetual IPA

Graphically Pleasing Label

Aroma: A thick luscious hop aroma fills your nose–reminiscent of tangerine, mango, and a touch of pineapple to go along with a small amount of classic grapefruit. Almost no malt aroma makes it through the hops, but what is evident has a very lightly toasted French bread quality. After further contemplation, some very light spicy hop notes are evident as well as a hint of pine forest. The hop aroma is the star here with many layers and a deep complexity. 12 / 12

Appearance: Near-crystal clarity with a hue that is only a couple shades deeper than a classic pilsner. Billowy off-white head forms sticky foam that resists until the last drop. 3 / 3

Flavor: Like the aroma, the flavor is dominated by hops. Grapefruit becomes more evident in the flavor, perhaps due to the fruitiness combining with the hops bittering qualities. There is a very light toasty malt component that needs to be searched for. Only the slightest hint of alcohol comes through; an impressive feat in a beer of this size. Personally, I love the flavor of this beer, but to better fit the style, it would require a little more malt complexity. 14 / 20

Mouth Feel: This beer is very dry and drinkable. The bitterness is firm, but on the low end of the style when compared to other commercial examples. I actually prefer this to the bracingly sharp bitterness of many IPAs. The body is medium, medium/light with a level of carbonation that is quenching but not harsh. 4 / 5

Overall Impression: A very well-balanced beer. The massive hop aroma and flavor is varied and intense while the relatively easy bitterness keeps the beer from being harsh and enhances its ability to be consumed one after another. I love this beer and hope to find a less-expensive source of it so it can become a routine drinker. It’s interesting that the label refers to this beer as an ‘Imperial Pale Ale’ rather than ‘India Pale Ale’–perhaps this is an allusion to the lean malt character and restrained bitterness? 8 / 10

Score: 41 / 50 (Outstanding)

Note: Evaluation done according to BJCP Scoring System. This beer was reviewed as a Category 14b. American IPA.

Hipster Ribs Paired with Lolita

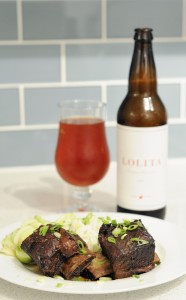
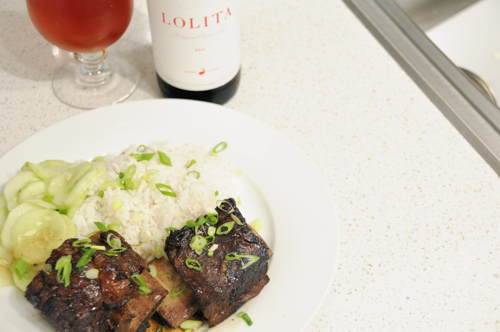
Braised Short Ribs, Cucumber Salad, and Goose Island Lolita

Sweet, salty, and savory

Taking short ribs–a tough cut of meat full of connective tissue and fat–searing it and then slowly braising it in beer (or other liquid) can do amazing things. The Belgians do it with their Carbonade as do the French with their Beef Bourguignon. The result is a succulent, flavorful piece of meat that falls off the bone. The fat renders out of the meat, leaving behind some of the most tender morsels you can hope for. For this recipe, I’ve introduced an Asian-esque marinade for the short ribs prior to braising and then served it with a fresh cucumber salad and steamed rice. I then paired it all with Lolita from Goose Island.

The Process (or recipe, if you like)

Cooking from a recipe is not my style. Unless I’m baking and producing some sort of preserved or cured product, I rarely follow a recipe. Instead, I’m a firm believer in understanding the techniques (and the reasoning behind them), using the flavors I like, and tasting during prep to achieve these flavors. This recipe starts by marinating the short ribs for several hours in a combination of soy, rice vinegar, mirin, sugar, ginger, garlic, chili paste, and a touch of sesame oil.  After several hours of marinating, preheat the oven to 300° F and begin heating some oil in a heavy skillet (that has a lid). Once the oil is very hot, sear each short rib (you may need to do it in batches) on all sides. Remove the ribs and then deglaze in the pan with about 12 oz. of beer. I used PBR because its neutral character wouldn’t conflict with the already bright flavors in the marinade. Add the ribs back to the pan and place in the oven (covered) for about 3 hours or until fork tender. For the last 30 minutes of cooking, remove the lid and baste every 5 minutes with the braising liquid. Serve with steamed rice and cucumber salad. The cucumber salad was quick-pickled (for about 5 hours) in a mixture of rice vinegar, salt, and sugar.

Short Ribs Paired with Goose Islane Lolita

Sweet, savory, salty– all rolled into one

So, was it any good?

'The Homebrew Wife' Approves

Looks like The Homebrewer’s Wife approves

Individually, both the plate of food and the beer were killer. The high point of the pairing was how the acidity of Lolita helped cleanse the palate and wash away some of the heavy fatty aspects of the short ribs. Additionally, the beer had an almost wine-like character and hint of oak tannin that also helped balance the richness of the meat.  The biggest issue was that the heavy raspberry flavor in the beer clashed with some of the umami-like beef flavors in the ribs.  Additionally, the cucumber salad provided a nice acidic counterpoint to the rich beef, making the acidity of the beer redundant and unnecessary.